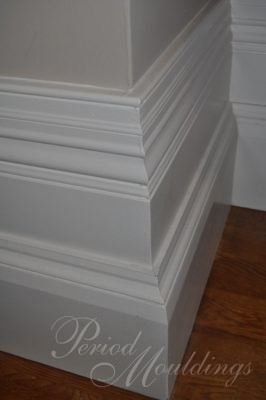
Skirting boards are a common feature of the home to be replaced, particularly in a Victorian property where rooms are larger and perhaps the boards have been subject to damage and deterioration, at least historically if not more recently. Skirting boards are relatively cost-effective to buy, and hence it is often not worth trying to repair them unless you are looking at very minor cosmetic damage. Repairs can take a lot of time and a lot of wood filler, and hence it is often not time effective to repair something that might not even look right when you have finished.
That’s why we have put together a handy three-step guide to help you replace your skirting boards and how to make the right choices at each stage.
1. Choosing the right board
There are a number of ways you can source the correct board for your room. You can take a part of the existing board to a carpentry workshop and ask them to copy it. You could also have a go at making the board yourself if your DIY skills are up to it and you have the required tools. But by far the easiest and least expensive way to replace skirting boards is to find a style that matches, or closely matches, the existing style from a stockist.
If you are replacing skirting in the whole room and your home has defined Victorian styling, then you can stick to Victorian skirting, or you could choose contemporary skirting if it suits the room. If you are looking to install a slightly different design – maybe Georgian skirting or Edwardian skirting – just ensure that the style suits other features of the room and is consistent with adjacent corridors. Taller rooms should have taller skirting, and vice versa, and allow for dado rails if required.

2. Fitting the boards
Presuming you are replacing all your boards, buy mixed lengths to suit the different wall lengths and hence avoid too much wastage. The most challenging aspect of fitting the boards is the fact that Victorian properties often have uneven walls or floors, or the corners of a room are not at an exact 90˚ angle. This will require some skill and patience to get the joints right, and the use of a mitre or scribe is critical in achieving as neat an angle as possible. Wood filler becomes a very useful tool here also, but ensure you use it carefully to result in as neat a finish as possible.
Where the wall or floor isn’t completely flat you may need to prepare a backboard on which to attach the skirting, or you can plane the skirting to match the profile of the floor.
3. Painting the boards
Painting skirting boards is essential, as they are subject to more wear and tear than any other feature in a room; from vacuum cleaners, children and pets. To make life easier you can apply a coat of primer to the boards before you fit them. This allows you to choose the final colour with the boards in situ, if you have not been able to visualise this and make a decision previously. This also allows you to prime the back of the boards, which will undoubtedly increase their lifespan.
The skirting can then be fitted to the wall with glue, screws and/or nails, filled to suit and sanded where required, before you dust it down thoroughly and apply the top coats.
It is important to remember that skirting boards are a critical feature of a period home and are more visual then you perhaps realise, particularly when they are often painted in contrast colours or to help maintain a colour scheme. Choose the style wisely for consistency, fit them carefully for appearance and longevity and paint them with an eye on finish and durability.

